Dave Budd was the first person to come to mind for the job. He is based to the north of Dartmoor in Devon and is well known for his interest in recreating iron tools. Dave is often at reenactment shows and festivals, demonstrating iron working techniques from the past.

So my friend Alex Arthur (a woodsman and charcoal burner) and I headed down to Cheriton Bishop to go and see him. Dave's workshop is tucked away in ten acres of woodland and getting to it involves a walk across a field and through the woods.

After walking a short way along a track, I came to Dave's forge:


Dave used a chrome/vanadium alloy steel to make the blades. This means that they will be better in use than alloys used in medieval times.
First, the iron bar was roughly brought to shape using a power hammer. Again, not a medieval method but it saved a lot of time.

Each blade was then shaped by hand on the anvil and swage block. I wanted the forged look to the blades, as carving tools in medieval times would usually be made by the local blacksmith or by the carvers themselves.


Another interesting tool that Dave used was the fly press. This was used to stamp his logo onto the blades and to cut the shoulders which butt onto the tang (the spike that goes into the handle).
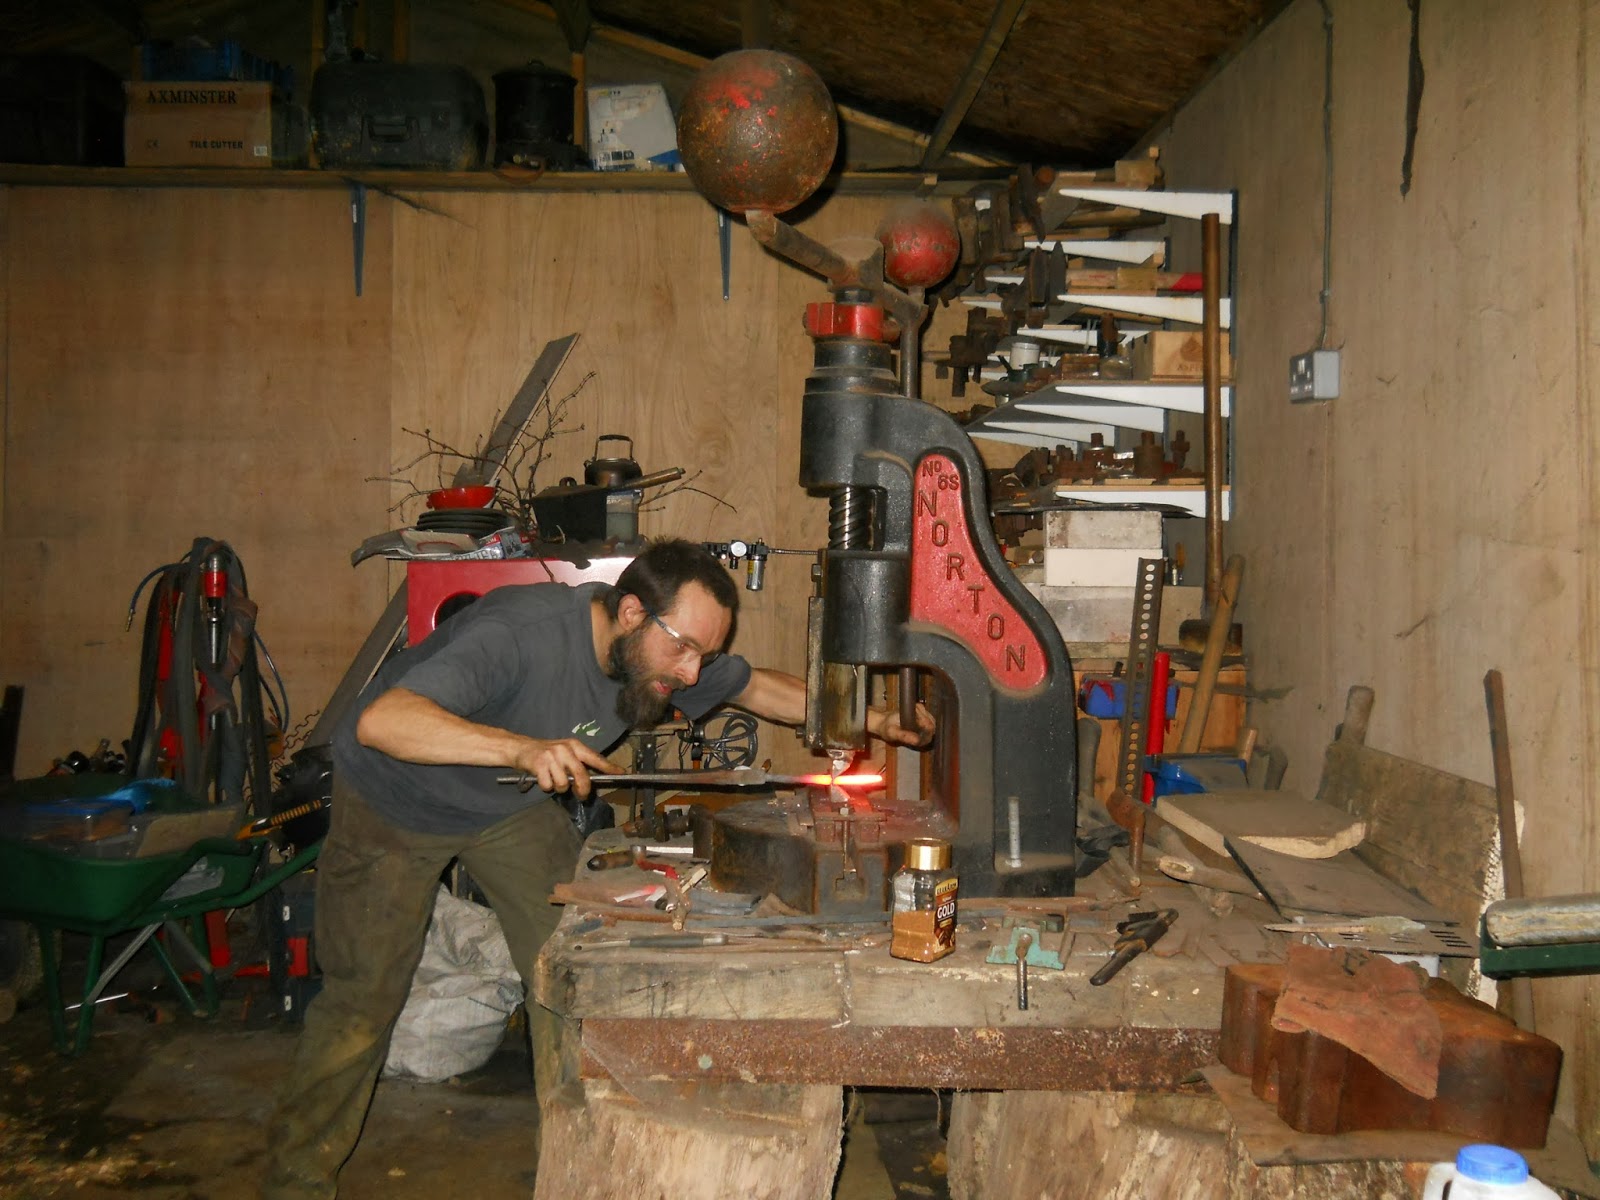
Finally, after the blades had been shaped, they were ground on an abrasive belt to put on the bevels of the cutting edges.

And here are the three blades that Dave made:

The next stage, after some final shaping, is for the blades to be heated slowly and then cooled to give them the correct temper. There will also be another large gouge made with a socket into which the handle will fit, rather than the tangs that these tools have. I'm then going to make the handles, probably from locally-sourced boxwood, which will be fitted and then the tools should be good to go!
Whilst at the workshop, Dave also showed me two spoon augers that he has made for use at the Peat Moors Teaching Centre in Somerset. Before the familiar spiralling drill bit was invented, spoon augers were the normal tool for cutting holes larger than a gimlet could manage. Anglo Saxon and Viking carpenters would have used spoon augers and chair makers used them even into the nineteenth century.
The pointed blade is more suitable for drilling into endgrain, whereas the rounded blade is better at cutting into sidegrain, although care needs to be taken that the blades don't catch which could make them snap. The larger auger with the rounded blade has a chest brace fitted, so that the weight of the user's body can be put behind it.

We also had a wander around Dave's woodland and saw his teaching forges, where he runs courses in early smithing techniques.

It was a very enjoyable afternoon in the woods with Alex and Dave and I hope that we get to meet up again soon. You can see more of Dave's work at his website, just click on the link here.
No comments:
Post a Comment